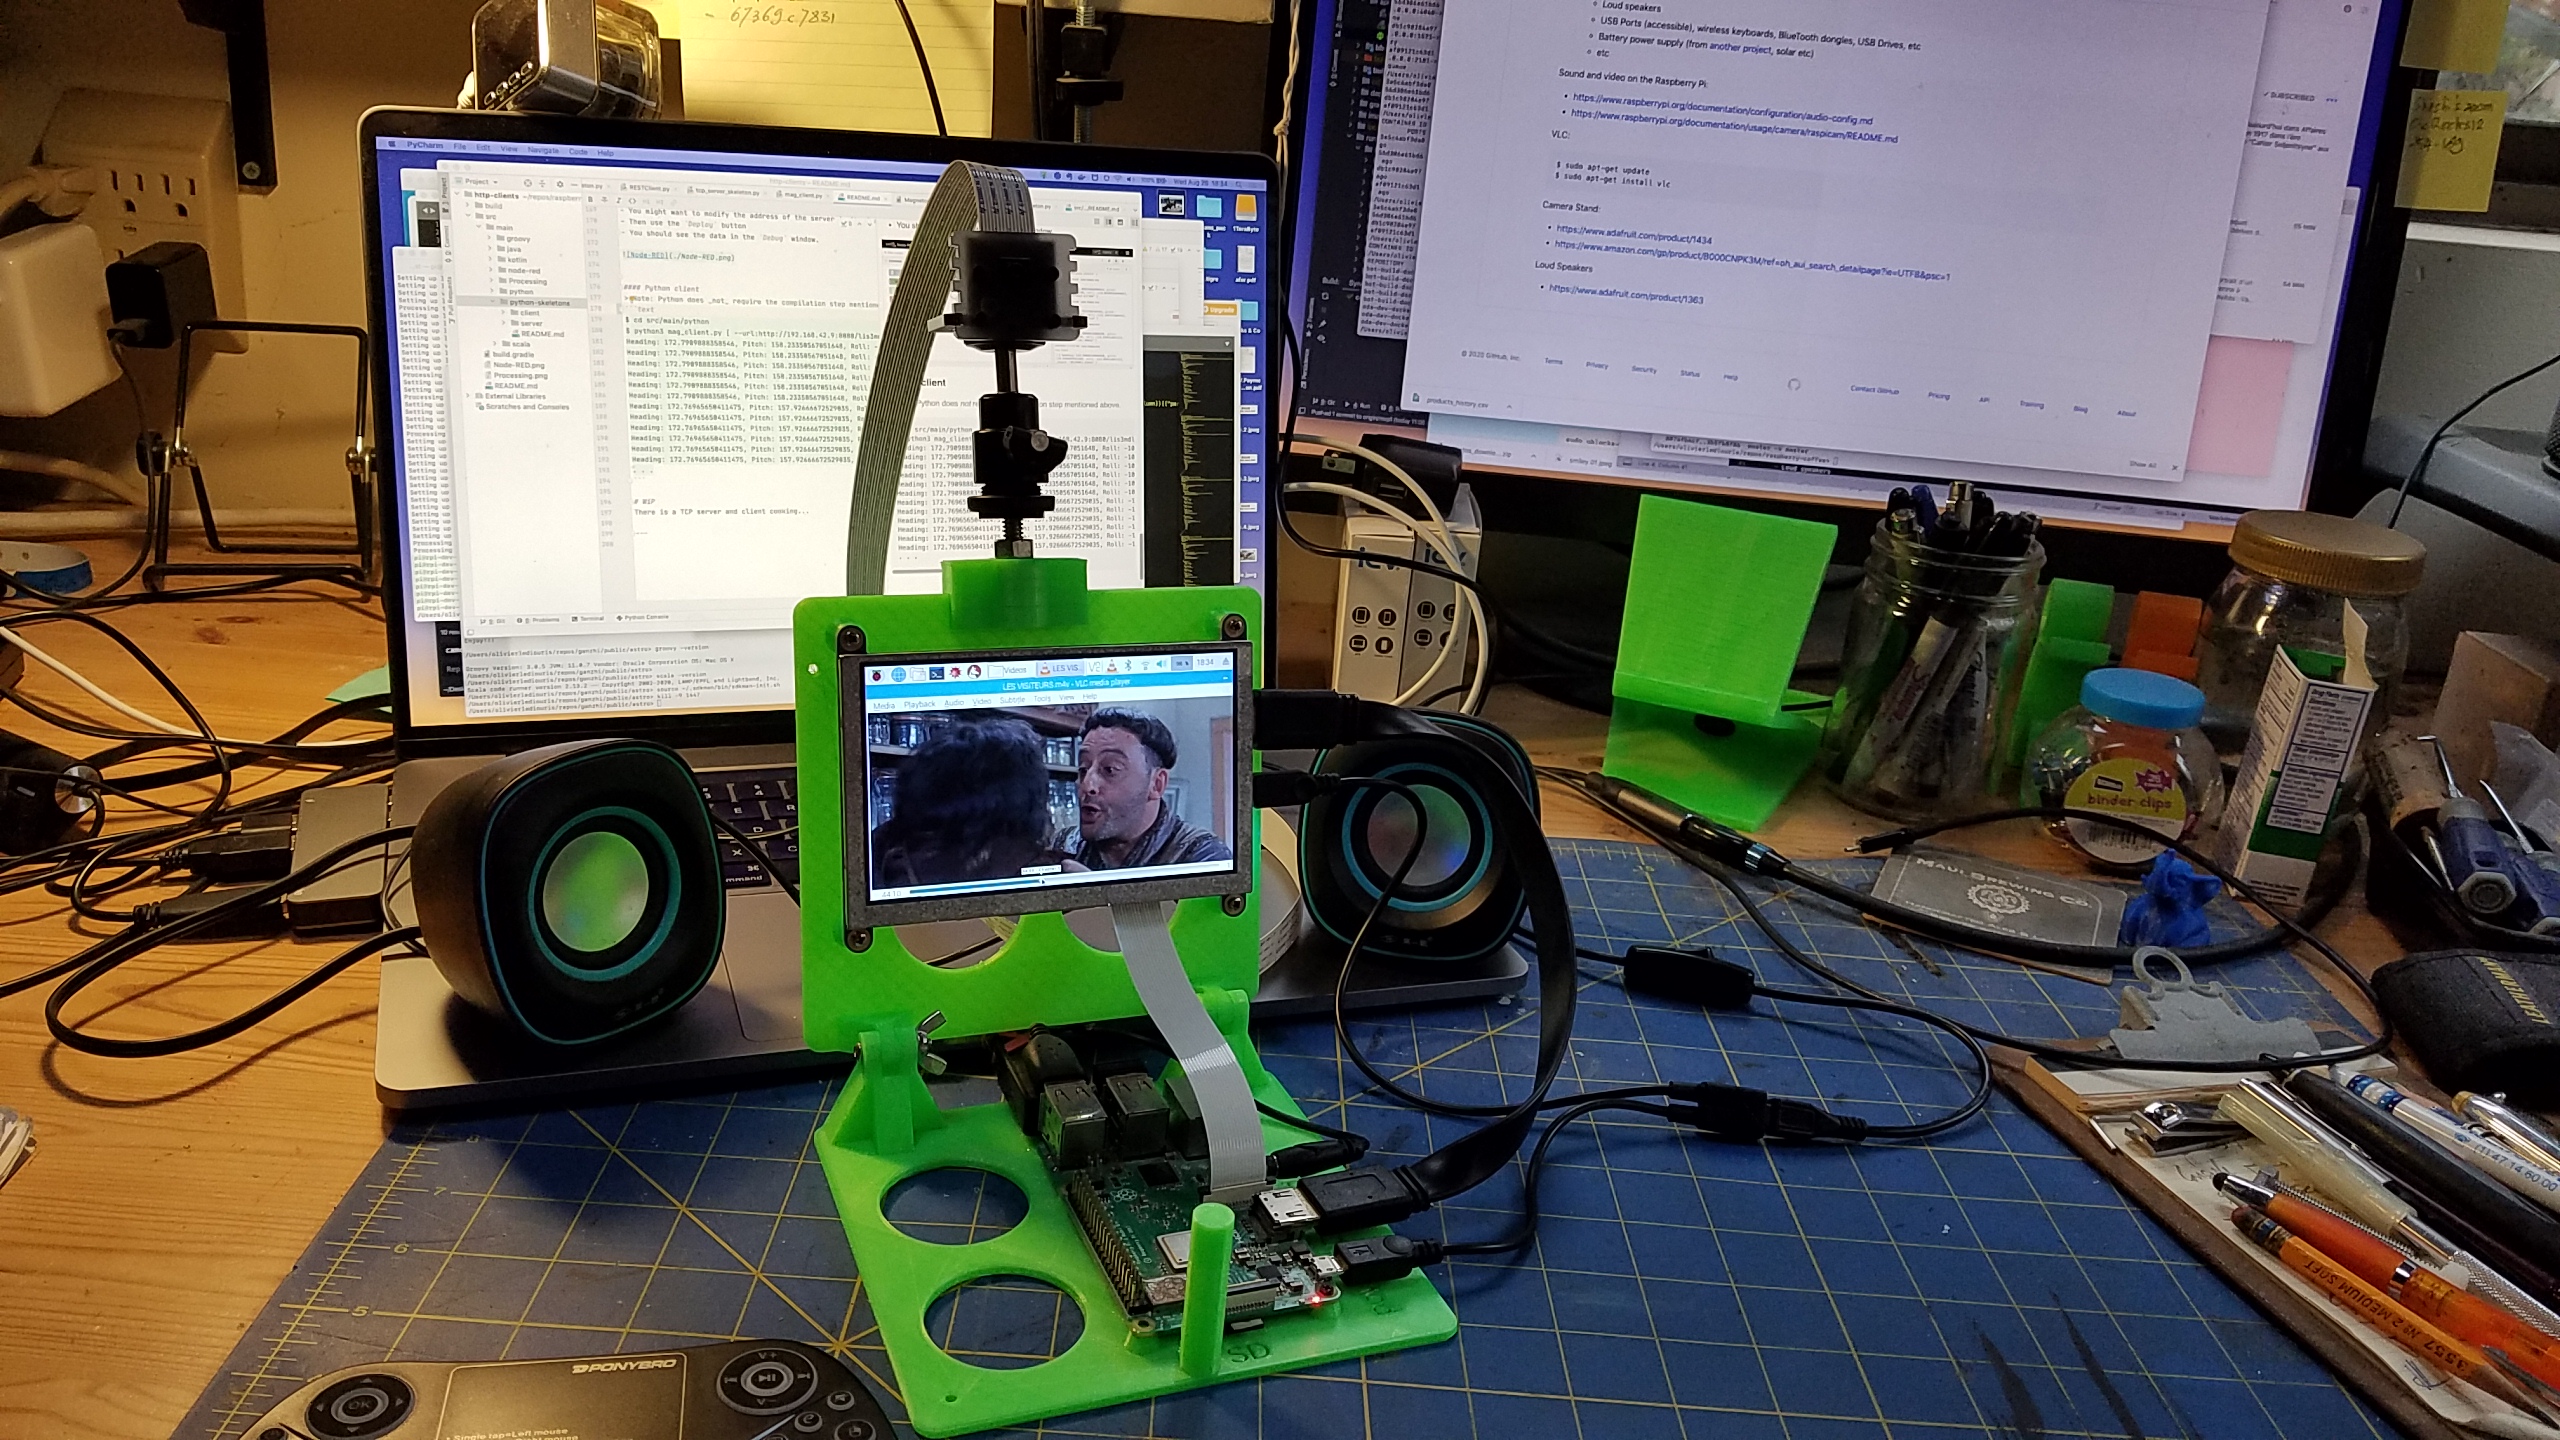
Wednesday, July 14, 2021

Another (new) concept?

We would call it Flake Computing, as opposed to Cloud Computing.

Think of it like Cloud Computing without Internet...

For example, you are on your boat, crossing an ocean, you do not pay those big fees to get a satellite communication and connexion, but your boat is equipped with sensors - TCP (or so) enabled. You have a single board computer on board (<- now THAT's a good one! like a Raspberry Pi, BeagleBone, etc), that can emit its own network, WiFi or not. 

Nothing is preventing you from pulling the data emitted by the sensors, to process and compute them. Networks and Internet are different things... LAN, WAN, etc. (EZ: Entropy Zero...)

And nothing is preventing laptops, tablets, cell-phones or any such devices to get connected to the same network, to display the data processed by the single-board computer in a nice Web GUI (or any other GUI).

More later.


Friday, February 26, 2021

Night at 8

It's quite interesting to see that in several languages (mostly of latin or european origin), the word "night" begins with an "n", followed by something sounding very much like the number "8", in that language...
LanguageEightNight
Englisheightnight
Frenchhuitnuit
Spanishochonoche
Portugueseoitonoite
Italianottonotte
Latinoctonocte
Germanachtnacht
Dutchachtnacht
Brittoneizhnoz
Norwegianåttenatt
Romanianoptnopți

Friday, January 22, 2021

Several configurations for a Raspberry Pi Laptop

The Raspberry Pi is a cool single-board computer, modular, onto which you can hook up web cam, loudspeakers, external hard drives, all kinds of devices.
It has wireless and bluetooth connectivity, several USB ports, an Ethernet port. It has everthing I expect from a computer.
It can play music and movies, with the new Raspberry Pi 4 and its 8 Gigabytes of RAM, I can even do real development work without any problem, with tools like PyCharm or IntelliJ.

The Raspberry Pi 400 has recently been released, this is a very cool configuration to think about. For 100.00 USD it comes with the board (4Gb of RAM), a keyboard and a mouse. "All" you need to add is one (or two) HDMI screen(s).
A desktop HDMI screen can be an expensive device...

Along the same lines, below are a couple of configs I came up with before the Raspberry Pi 400 was released..., keeping in mind that those configs are mobile configs, not desktop ones.

The different configurations presented here can be acheived for less than 150.00 USD. And they do work for real.
Note: The configurations presented below have small screens... But nothing is preventing you to plug in a big one.

Here are several configurations for a small Raspberry Pi based laptop, to be taken on the go.

Click on the pictures to enlarge them.

The links in the text below will lead you somewhere in this git repo, with all the STL files and details on the hardware used for each configuration.


In its Pelican box, with a 7" touchscreen (no keyboard needed, it's like a tablet). The Raspberry Pi is behind the screen, ducked in the foam.

With a wood and plexiglass custom case, a breadboard, wireless keyboard with touchpad, and a 7" HDMI screen

Raspberry Pi 4, 7" HDMI high-definition screen, wireless keyboard, in its own 3D printed holder. (STL files for 3D-printing are available here).
Same config, but without the holder, in a Pelican case It all fits in
Putting things to work At work!

Yet another config, in a waterproof box, with webcam, 5" HDMI screen and small wireless keyboard (STL files for 3D-printing are available here).
In the box, closed. Connecting the loudspeakers
Unpacking At work.

With an Adafruit 3.5" TFT, as explained here:
Same config, with another enclosure (all STL files available here):

And there is a Raspbian OS 64-bit version in preview... I'm looking forward to the 16Gb version of the Raspberry Pi 4!

Sunday, November 29, 2020

Mac Look and Feel, on a real computer!

 Definitely something to check out: Twister OS

It runs on pretty much any Raspberry Pi 4, it comes loaded with tons of cool apps, and it possibly looks like a Mac Desktop 😀.

I'll look deeper into it, but it sounds already promising!


Thursday, November 26, 2020

PKIX path building failed

I was gradle'ng on the Raspberry Pi Zero as usual, and during a build, I had the following message: 

sun.security.validator.ValidatorException: PKIX path building failed: sun.security.provider.certpath.SunCertPathBuilderException: unable to find valid certification path to requested target

What the Fr*nch??!

I spent too much time and sweat trying to find a solution.
If that happens to you, just re-install your JDK!

sudo apt-get update 
sudo apt-get install openjdk-8-jdk-headless

The Raspberry Pi Zero cannot - so far - run a Java version above 8. 
This operation above also re-installs the required certificates. 
And you're back on track.

Friday, November 20, 2020

Raspberry Pi based fully featured small laptop

 The full project is here, with the STL and OpenSCAD files for 3D printing, and the list of parts.

It comes with screen, keyboard, touchpad, speakers, camera, USB ports...

It plays movies, music, fully featured!! And for less than $100.

At work


Friday, May 29, 2020

Raspberry Pi 4 with 8GB of RAM...

Released yesterday, there is now a Raspberry Pi 4 with 8Gb of RAM, for $75 in the US!
(See the Raspberry Pi blog).
And it comes along with a beta-64 bit OS, named Raspi OS, that targets Raspberry Pis 3 and higher.

I tried it (on a Raspberry Pi 4, with 4 Gb of RAM), it works fine, and fast!
This beta version does not come with Java installed, but a simple sudo apt-get install default-jdk installs it (JDK 11) in a couple of minutes.
I cloned a repo (https://github.com/OlivierLD/raspberry-coffee.git) and built it without any problem or error.

Now, I might wait a bit longer to get a new Raspberry Pi. As it is now, it should be able to support 16 Gb of RM, I'll wait a bit, and see...

Anyway, that makes yet another good reason NOT to get a Mac.
Steve Jobs vs Eben Upton..., I vote for Eben Upton, biiiiiig time.


Friday, May 22, 2020

Using OpenCV to downgrade an image

This is a bunch of comments on the code visible on github. The goal here is to downgrade a color image to display it on a led matrix, like a small OLED screen here, an SSD1306. We will use OpenCV, in Java. Here are the steps we follow:
  • We start from the colored image
  • We turn it to gray
  • We thresh it
  • We resize it (smaller)
  • We store it in a file, custom format
  • We can then display the image on the led matrix (oled screen here)
Original Grayed
Threshed Resized
The level of details of the final display is obtained during the threshold part.
See in OpenCVSwingColor2BW.java:
    // threshold
    Mat threshed = new Mat();
    Imgproc.threshold(gray,
            threshed,
            150, // 127,
            255,
            0);
Tweaking the thresh parameter (150 above) leads to different results.
The final result is stored in a binary file (image.dat).
The matrix used here is 128x64 pixels big. The file will contain 64 lines of 2 longs.
A Java long has 64 bits, 2 longs make 128 bits, that's all we need to encode one line of 128 leds on the screen.
See the code in OpenCVSwingColor2BW.java for details.

Adios Papou

Thursday, January 09, 2020

dAISy AIS HAT for the Raspberry Pi

Just received the dAISy HAT from Wegmatt, it just works!
Whoever can click can do it.

And this was the opportunity to keep working on the AISParser, and I have also added a custom TCP Forwarder to the Multiplexer, along with an AIS filter on the regular TCP Forwarder.

This way, you can forward NMEA data on one port, and AIS data on another one. This is not necessary, but it can be nice to have.

Here is an example of a yaml driving the Multiplexer:

#
# MUX definition.
#
name: "With a GPS and AIS"
context:
  with.http.server: true
  http.port: 9999
  init.cache: true
channels:
  - type: serial
    # GPS
    port: /dev/ttyUSB0
    baudrate: 4800
    verbose: false
  - type: serial
    # AIS
    port: /dev/ttyS0
    baudrate: 38400
    verbose: false
forwarders:
  - type: tcp
    port: 7002
    properties: no.ais.properties
  - type: tcp
    subclass: nmea.forwarders.AISTCPServer
    port: 7003
computers:
  - cls: nmea.computers.AISManager
    properties: ais.mgr.properties

And OpenCPN is happy in both cases.

See more details here.

Friday, August 30, 2019

Autonomous Raspberry Pi

Solar powered, with a wireless keyboard and touchpad.

Solar powered, with a wireless keyboard and touchpad.


The solar panel

Closed. The keyboard can also fit in the box.

Wednesday, July 17, 2019

Sunday, April 21, 2019

San Juan Islands, WA

Data logging in San Juan Islands, Washington:

Apr 19-21, San Juan Island

Apr 22, San Juan Island to Orcas Island

Apr 23, Hiking in Orcas Island

Apr 24, Hiking in Orcas Island, Mountain Lake

Apr-25, Back ashore


Data logging was done as explained here, here and here.

Tuesday, March 12, 2019

Easy Low Pass Filter

Instead of implementing a buffer and smooth it, there is a much easier and efficient way to do it. Here is a simple JavaScript implementation. First you define your accumulator function:
 function lowPass(alpha, value, acc) {
   return (value * alpha) + (acc * (1 - alpha));
 }
Then you need to define your APLHA coefficient:
 const ALPHA = 0.015;
Then you can invoke the accumulator with the aplha coefficient on the data to smooth:
 let filteredGustArray = [];
 let acc = 0;
 data.data.forEach(dp => {
   acc = lowPass(ALPHA, dp.gust, acc);
   filteredGustArray.push(acc);
 });
This produces an array containing the smoothed data. Here is a representation of what it looks like, along with the data to smooth (raw data in red, smoothed data in blue):
The demo data are available here. Just run the script with nodejs like
 $ node max.gust.js both > data.csv
This will produce a csv file you can then import into any spreadsheet program, to see the figure above.

Monday, March 11, 2019

Smart TCP Watch, prototype.

TCP, no BlueTooth (and as a result, no Smart Phone) is required. The "watch" can connect directly to the network.
See a first prototype here.
And a short video here.

Monday, November 26, 2018

Saturday, August 25, 2018

Smart watch..., who's smart, who's watching?

I got a Pebble watch a while back, for $100 it did everything I was expecting from it. I came with a cloud/web-based IDE, a really fine piece of work, it was possible to develop and debug applications running on the watch in JavaScript, that was really well done, smart and neat.
Then a while back, Pebble got acquired by Fitbit. And now, the Cloud IDE of Pebble is not available anymore. Than means I cannot develop new apps for my Pebble, even if it is still working just fine.
Why would I buy a new watch (twice as expensive), and re-write all my apps? This is quite frustrating...
In fact, there was something wrong from the beginning.
All those so-called smart watches need a Bluetooth cell-phone to connect to, and from there it will reach other data. Why not a TCP-based protocol from the watch, to bypass the phone? Power consumption? I doubt it.
This is not about accessibility or configuration either, I do it all the time for Raspberry Pis and similar boards, ssh and similar protocols have been here for this kind of remote access, for ages, and for good reasons.
Smart glasses, head-up displays (HUD), smart watches, all those devices are just displays, all they need is to connect to a data bus and display what they mean to (just like an NMEA bus).
I suspect some marketing bullshit behind the scene..., again.

If this kind of TCP watch does not show up soon, I'll build one. Bam!

Saturday, July 14, 2018

Raspberry PI, PWM, servos, and PCA9685

The code mentioned below can be found in this git repo.
Pulse Width Modulation (PWM) is the technique used from a digital source to simulate an analog output.
For example, imagine that you want to dim an led from a digital device, to make it look like it is glowing. The digital device only has pins that can take 2 values: 0 or 3V3.
0 means that the led will be off, 3V3 means it will be on, at 100% of its brightness.
In short, it is on or off, and there is nothing in between.
But here is an idea to work around that issue:
To show it at 50% of its brightness, the idea is to turn it off 50% of the time, and on 50% of the time.
To show it at 25% of its brightness, it will be on 25% of the time, and off 75% of the time.
If the on-off cycles are short and fast enough, a human eye will no be able to see them, it will only have the illusion of the resulting brightness.
A human eye cannot make the distinction between images separated by less than one 10th of a second. That is why the movies are shot at 24 images per second, so you cannot tell the difference between the frames.
This technique is call Persistence of Vision (POV).
The #1 parameter of PoV is the human retina. To have an idea of how much it is important, just put your cat in front of a TV, and see how much he/she reacts. To a cat, it might just be a fuzzy screen...
The early movies - like Charlie Chaplin's silent ones - were shot at 16 images per second, fast enough to induce POV. They were later projected by faster projectors - 24 frames per second. That is why the characters seem to move faster. They were originally moving normally.


Here are examples of PWM applied to POV:
At work, for real:
The PCA9685 is a servo driver PCB.
The Raspberry PI does not have analog pins, we need to use Pulse Width Modulation to simulate analog values, a servo is an analog device.
We use for that the method setPWM(channel, 0, pulse), that will eventually write to the registers of the device.
An instruction like setPWM(channel, 0, pulse) means:
  • On channel channel (0 to 15 on the PCA9685)
  • in each cycle, turn the power on between 0 and pulse.
pulse has a value between 0 and 4095, that is 4096 distinct values, 4096 is 212, the PCA9685 is a 12 bit device.

The frequency

The frequency is provided in Hertz (Hz). A frequency of 60 means 60 cycles per second.
At 60 Hz, a cycle will be 1 / 60 second, which is 0.01666666 second, or 16.66666 milli-second (ms).

The pulse

For each of the cycles set above by setting the frequency, we need to determine the int value, between 0 and 4095, corresponding to the pulse in milliseconds we want to simulate with PWM.
In the class i2c.servo.pwm.PCA9685.java, this is done in this method:
public static int getServoValueFromPulse(int freq, float targetPulse) {
  double pulseLength = 1_000_000; // 1s = 1,000,000 us per pulse. "us" is to be read "micro (mu) sec".
  pulseLength /= freq;  // 40..1000 Hz
  pulseLength /= 4_096; // 12 bits of resolution. 4096 = 2^12
  int pulse = (int) Math.round((targetPulse * 1_000) / pulseLength); // in millisec
  if (verbose) {
    System.out.println(String.format("%.04f \u00b5s per bit, pulse: %d", pulseLength, pulse));
  }
  return pulse;
}
The cycle length (in ms) obviously depends on the frequency.
The pulse required for the servo to work is emitted once per cycle.

Example

As an example, let us calculate for a 60 Hz frequency the pulse value to send to setPWM(channel, 0, pulse) for a 1.5 millisecond PWM:
  • 1 cycle has a duration of 1 / 60 second, or 16.66666 milliseconds.
  • each cycle is divided in 4096 slots, we can say that 4096 bits = 16.6666 ms.
  • the solution is provided by a rule of three: value = 4096 * (pulse / 16.66666), which is 368.64, rounded to 369.

A comment about servos' compliance and reliability

Theoretically, servos follow those rules:
PulseStandardContinuous
1.5 ms0 °Stop
2.0 ms90 °FullSpeed forward
1.0 ms-90 °FullSpeed backward
That happens not to be always true, some servos (like https://www.adafruit.com/product/169 or https://www.adafruit.com/product/155) have values going between 0.5 ms and 2.5 ms.
Before using them, servos should be calibrated. You can use the class i2c.samples.IntercativeServo.java can be used for that, you set the pulse values interactively, and you see what the servo is doing.
$> ./inter.servo
Connected to bus. OK.
Connected to device. OK.
freq (40-1000)  ? > 60
Setting PWM frequency to 60 Hz
Estimated pre-scale: 100.72526
Final pre-scale: 101.0
Servo Channel (0-15) : 1
Entry method: T for Ticks (0..4095), P for Pulse (in ms) > p
Enter 'quit' to exit.
Pulse in ms > 1.5
setServoPulse(1, 1.5)
4.0690 μs per bit, pulse:369
-------------------
Pulse in ms > 0.5
setServoPulse(1, 0.5)
4.0690 μs per bit, pulse:122
-------------------
Pulse in ms > 0.6
setServoPulse(1, 0.6)
4.0690 μs per bit, pulse:147
-------------------
Pulse in ms > 2.4
setServoPulse(1, 2.4)
4.0690 μs per bit, pulse:589
-------------------
Pulse in ms > 2.5
setServoPulse(1, 2.5)
4.0690 μs per bit, pulse:614
-------------------
... etc.

Once you have determined the appropriate min and max values, you also have the int values to feed the setPWM with.

Some links:

Tuesday, June 12, 2018

Languages Comparison

For the fun: Same problem addressed in several languages, read the paper here.

It is about matrix and systems of equations resolution, curve smoothing, etc.

Done in C, Java, Processing, Scala, Kotlin, Python, JavaScript, Groovy, Go, Clojure (in progress), ...

Tuesday, April 24, 2018

Controlling invisible machines with emails, from Java

Here is the problem

You have your network at home, with several machines connected to it (laptops, tablets, Raspberry PIs, phones, etc). Your home network is a Local Area Network (aka LAN), the machines can see each other, but they cannot be seen from outside, from the Internet.
You may very well want to deal with those machines while away from home, to restart services, launch a new program, or even reboot.
In the configuration mentioned above, this is simple, you just cannot do it. And that is frustrating!
There is a way though. Those machines on your home LAN can send and receive emails...

Using JavaMail

JavaMail is a Java package that has been available for ever, it understands the email protocols (IMAP, POP3, SMTP, etc), and can be used to interact with email accounts programmatically.

An example

There is an example of such an interaction on this github repository.
The fastest way to get it running is to run the following commands (these are for Linux - and MacOS - on Windows, use the git shell):
$ git clone https://github.com/OlivierLD/raspberry-coffee.git
$ cd raspberry-coffee
$ cd common-utils
$ ../gradlew shadowJar
$ cp email.properties.sample email.properties
$ vi email.properties
$ # Here you modify your properties file to match your email account
$ java -cp ./build/libs/common-utils-1.0-all.jar email.examples.EmailWatcher -send:google -receive:google
The -send:google -receive:google depends on the settings in your email.properties.
Then, to the account mentioned in the email.properties, send a message like this:
Subject: execute
Content:
whoami
ifconfig
uname -a
Note: this example requires the content to be in plain/text.
Once the message is received by the EmailWatcher, it sends you an acknowledgement:
Then, the 3 commands are processed by the EmailWatcher, you would see in its console an output like that:
Start receiving.
Received:
whoami
ifconfig
uname -a

Operation: [execute], sent for processing...
pi
lo0: flags=8049 mtu 16384
 options=1203
 inet 127.0.0.1 netmask 0xff000000 
 inet6 ::1 prefixlen 128 
...
And finally, you receive an email like that:
... meaning that the commands you've sent have been executed.

You can also attach the script to execute to a blank email, with topic execute-script:
Attach a file like this:

#!/bin/bash
whoami
ifconfig
ps -ef | grep EmailWatcher
... and just wait for the result to come back to you:
Scripts execution returned: 
pi
eth0: flags=4099  mtu 1500
        ether a4:ba:db:c9:04:2e  txqueuelen 1000  (Ethernet)
        RX packets 0  bytes 0 (0.0 B)
        RX errors 0  dropped 0  overruns 0  frame 0
        TX packets 0  bytes 0 (0.0 B)
        TX errors 0  dropped 0 overruns 0  carrier 0  collisions 0
        device interrupt 18  

lo: flags=73  mtu 65536
        inet 127.0.0.1  netmask 255.0.0.0
        inet6 ::1  prefixlen 128  scopeid 0x10
        loop  txqueuelen 1  (Local Loopback)
        RX packets 9215  bytes 2022884 (1.9 MiB)
        RX errors 0  dropped 0  overruns 0  frame 0
        TX packets 9215  bytes 2022884 (1.9 MiB)
        TX errors 0  dropped 0 overruns 0  carrier 0  collisions 0

wlan0: flags=4163  mtu 1500
        inet 192.168.42.3  netmask 255.255.255.0  broadcast 192.168.42.255
        inet6 fe80::4038:1f53:b94f:ccc2  prefixlen 64  scopeid 0x20
        ether 78:e4:00:78:ad:8f  txqueuelen 1000  (Ethernet)
        RX packets 8848724  bytes 696021134 (663.7 MiB)
        RX errors 0  dropped 0  overruns 0  frame 18848059
        TX packets 6040965  bytes 795472510 (758.6 MiB)
        TX errors 0  dropped 0 overruns 0  carrier 0  collisions 0
        device interrupt 17  base 0xc000  

pi      12476 12472  1 16:39 pts/0    00:00:53 java -cp ./build/libs/RasPISamples-1.0-all.jar weatherstation.email.EmailWatcher -send:google -receive:google
pi      16204 16199  0 18:04 pts/0    00:00:00 grep EmailWatcher
>> sh ./attachments/2018-04-26_18-04-27/sample.sh returned status 0

Comments

This process is not synchronous, this could be a drawback... But still, it allows you to interact remotely with machines invisible from the Internet.

Having the command

java -cp ./build/libs/common-utils-1.0-all.jar email.examples.EmailWatcher -send:google -receive:google
fired when the machine boots will allow you make sure it is waiting for your emails as soon as the machine is up.

This EmailWatcher as it is also allows you to execute scripts, attached to the email. Look into the code for details ;)
It is even possible to ssh to another machine and execute a bunch of commands stored in a script... The command you send in the email's body would be like

ssh pi@192.148.42.13 bash -s < ~/nodepi.banner.sh
If a password is required, use sshpass:
sshpass -p 'secret-password' ssh pi@192.148.42.13 bash -s < ~/nodepi.sudo.sh
You can even sudo:
echo 'secret-password' | sudo -S privilegedCommand
This can be dangerous, hey? With great power come great responsibilities...

Sunday, April 15, 2018

Head-Up Display (HUD)

The idea here is to display a screen on a transparent support - like a wind shield.
The data are displayed on the screen, reflected on the transparent support, and nothing is preventing you from seeing through it.
(Click the image to enlarge it)

Here is above an HTML page, tweaked by some CSS classes to mirror the data (as the page is reflected on the screen, the page content has to be displayed as in a mirror, and flipped upside down.). In this case, the page is rendered on Chromium in kiosk mode, running on a Raspberry PI with a touch screen attached to it.
CSS Classes:
    .mirror {
      display: block;
      -webkit-transform: matrix(-1, 0, 0, 1, 0, 0);
      -moz-transform: matrix(-1, 0, 0, 1, 0, 0);
      -o-transform: matrix(-1, 0, 0, 1, 0, 0);
      transform: matrix(-1, 0, 0, 1, 0, 0);
    }

    .upside-down {
      height: 100%;
      width: 100%;
      -moz-transform: rotate(180deg);
      -webkit-transform: rotate(180deg);
      -ms-transform: rotate(180deg);
      -o-transform: rotate(180deg);
      transform: rotate(180deg);
    }

    .mirror-upside-down {
      display: block;
      -webkit-transform: matrix(-1, 0, 0, 1, 0, 0) rotate(180deg);
      -moz-transform: matrix(-1, 0, 0, 1, 0, 0) rotate(180deg);
      -o-transform: matrix(-1, 0, 0, 1, 0, 0) rotate(180deg);
      transform: matrix(-1, 0, 0, 1, 0, 0) rotate(180deg);
    }

In the picture above, we use the class as follow:
<div id="the-div" class="mirror-upside-down big" style="padding: 0px; text-align: center;">
  <hr/>
  <table>
    <tr>
      <td colspan="2">GPS Data</td>
    </tr>
    <tr>
      <td>
        <span>Your position:</span>
        <br/>
        <span>N 37° 44.93'</span>
...
The page on the screen (not on the wind shield) would actually look like this:

GPS Data
Your position:
N 37° 44.93'
W 122°30.42'
Your Speed:
12.34 kts

You can also work around the perspective effect on the reflected page by tweaking the CSS classes:
    .mirror-upside-down {
      display: block;
      -webkit-transform: matrix(-1, 0, 0, 1, 0, 0) rotate(180deg) perspective(50em) rotateX(-40deg);
      -moz-transform: matrix(-1, 0, 0, 1, 0, 0) rotate(180deg) perspective(50em) rotateX(-40deg);
      -o-transform: matrix(-1, 0, 0, 1, 0, 0) rotate(180deg) perspective(50em) rotateX(-40deg);
      transform: matrix(-1, 0, 0, 1, 0, 0) rotate(180deg) perspective(50em) rotateX(-40deg);
    }

GPS Data
Your position:
N 37° 44.93'
W 122°30.42'
Your Speed:
12.34 kts
We call this the Star Wars effect. ;)

Possibilities are endless!
The full page is here.